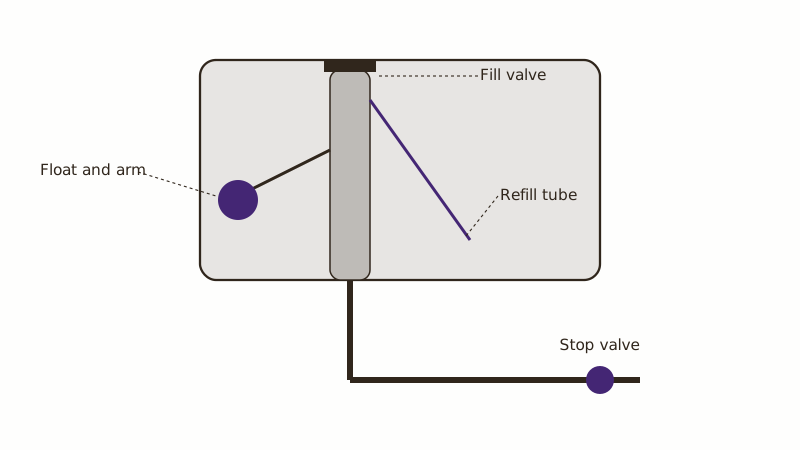
Pop the tank lid and find the upright assembly in the corner, usually on the left. That is the fill valve. It opens when the tank empties, closes once the float rises and keeps the toilet ready for the next flush. A valve that sputters, whistles, refills forever or leaves the tank half full has either worn out or been set wrong. Parts are cheap, and you need only pliers and a sponge. More choices sit under toilet repair and replacement.
Which symptoms point at the fill valve rather than something else?
Hissing once the tank is full, water running over the lip of the tall standpipe, a refill that crawls or stalls, and a tank that tops up with nobody flushing all point at the valve. Water riding up to the standpipe's rim means the valve or its float is not shutting off.
Clear the flapper first with a quick test: stir a little tint into the water in the tank and wait. Color creeping into the bowl convicts the flapper, which is the EPA's leak-detection method. When the bowl stays clear and the tank keeps hissing, the valve is the likely cause.
A valve fault alone can keep a toilet running even though nothing leaks into the bowl: the surplus just spills down the standpipe nonstop. If you are sorting through possibilities, why a toilet keeps running lines up the other candidates.
Is a repair possible, or does the whole valve have to go?
Sometimes a tweak is enough. Start with the float: a cup-style float lowers when you pinch its clip and slide it down the shaft, and a ball float responds to a bent arm or a turned screw. A noisy valve may only need grit rinsed out from under its cap. If neither works, the valve is spent and a new one is the cleaner fix.
Debris is a common reason a valve will not seal. Shut the supply, flush to empty the tank, lift the cap according to the manufacturer's directions and let a short burst of water carry the grit out, then put it back together.
Local water matters. Ontario's 2025 report shows hardness averaging 91 to 177 ppm depending on source, and mineral buildup can foul the seal inside a valve. If a cleaned valve fails again, swapping the whole unit beats fighting scale.
What is the process for installing a new fill valve?
Shut the supply, flush, sponge the tank dry, unhook the supply line, undo the large nut beneath the tank and take the old valve out. Position the replacement at the height its instructions specify, snug its nut by hand, hook the supply back up, clip the small refill hose to the standpipe and dial in the water level.
Before starting, gather a replacement valve, adjustable pliers, a sponge, a small bucket and towels, and photograph the old layout.
- Close the stop valve by turning it clockwise, then flush.
- Soak up the remaining tank water with a sponge.
- Unscrew the supply line beneath the valve. A towel under it catches drips.
- Undo the big plastic nut on the tank's underside and remove the old valve.
- Extend the replacement to the height its leaflet lists; its top normally ends up above the standpipe.
- Seat the valve, thread on the nut by hand and add a slight extra turn. Too much force cracks porcelain.
- Reattach the supply line, hand tight, then a slight turn with pliers.
- Clip the refill hose onto the standpipe, without pushing it down inside.
- Open the stop slowly, check every joint for drips and flush a few times.
Set the water level by the marker on the valve or tank wall. Too high wastes water through the standpipe, too low weakens the flush.
Where do the flapper and the tank-to-bowl seal come in?
A flapper seals the outlet in the tank's floor, and it is distinct from the fill valve. When it leaks, the valve has to run nonstop to replace the lost water. According to the EPA, flappers wear out, deserve periodic inspection and should be renewed within five years or sooner, and a swap is quick and inexpensive.
People who search for a flapper gasket usually mean either the flapper or the spud washer, the gasket that seals tank to bowl. Dripping between the tank and bowl calls for a gasket kit with new bolts, which means draining and lifting the tank. The flapper repair page handles the first case.
Bring the old part when you buy, because flapper shapes differ by toilet.
A toilet supply line has split. What now?
Shut the stop valve immediately. If it will not budge, go to the house main and close that. A failed supply line can dump water quickly, so mop up, run fans and check for dampness under flooring and in any ceiling below.
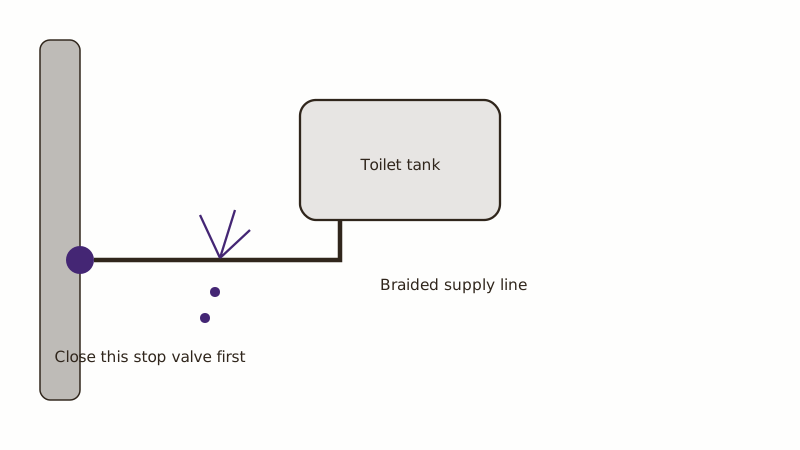
Supply lines fail at the fittings or burst with age. Braided stainless replacements are common and inexpensive, and since you disconnect the line during a valve swap anyway, replace an old one then. A stop valve that weeps or will not turn belongs to a plumber. Plumber for toilet leaks covers leaks at the floor and tank.
When the tank itself cracks or the base leaks, compare repair with a new toilet. Figures are on toilet replacement pricing.
Is a running toilet to blame for a big water bill?
Yes. The EPA estimates yearly household leak losses at more than 9,300 gallons, and its toilet page adds that household leaks can waste roughly 180 gallons each week, with toilets often the cause through worn flappers. A valve stuck open sends water down the standpipe day and night.
Suspect it when a bill jumps for no visible reason. Dye-test every toilet and listen once the house goes quiet. Other culprits are on the page about high water bills, and stopping a running toilet can repay its own cost in lower usage.
What situations call for a plumber?
Look for one when the stop valve is frozen or weeping, the tank is cracked, water pools at the base, a fresh valve still will not close or the supply line is beyond your comfort. One visit can cover the valve, the stop, the supply line and the flapper.
The quote page at Chaffey Pipe and Drain takes booking requests; the plumber who responds is local. Get the price in writing, parts included or not.
Common questions
Will this take an hour or more?
Thirty to sixty minutes is realistic for a first replacement, with a seized stop valve, corroded supply line or stubborn nut adding time. The sequence never changes: water off, tank empty, valve swapped, level set, then a leak check. Allow extra time if this is your first attempt.
How do I choose the right fill valve?
Measure from the tank floor to the rim of the standpipe, then check the height range printed on the package. Universal valves adjust to fit many tanks. An unusual tank may need the old valve brought along to match. Follow the instructions for the exact setting.
Why does the tank fill so slowly?
Partly closed stops, clogged valve screens and plain wear can all slow the refill. A kinked supply line does the same, so check that too. Open the stop fully, clean the valve and look for kinks in the supply line. If the refill is still sluggish afterward, replace the valve.
Is a leaking fill valve a hazard?
Rarely, but it wastes water and can overflow if it sticks open. A burst supply line is the bigger flooding risk. Know where the stop valve and the house main are, so you can shut either one quickly if something fails.
Should the flapper be replaced along with it?
Often, yes. Both parts age together, and the tank is already empty, while parts cost little next to a second repair visit. Check the flapper using the dye test above, and swap it if it looks worn, feels stiff or is more than five years old.